
iStorage Server Online Help

| KernSafe iSCSI SAN Quick Start | KernSafe iSCSI SAN User Manual |
|
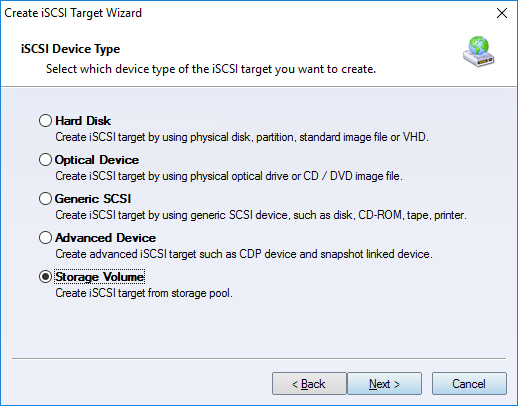
KernSafe iSCSI SAN is an IP storage solution that exports server-side storage devices to remote client machines as locally attached disks, optical drives, or tape devices. If you plan to use CHAP authentication, create at least one CHAP user and group first. In the examples below, a user named test belongs to a group named Administrators. To begin, click the Create button in the KernSafe iSCSI SAN Management Console. This opens the Select Device Type wizard, shown in Figure 1, where you can choose the device type to publish.
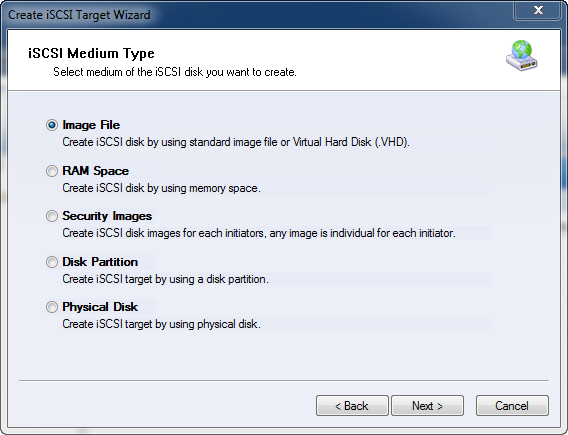
1. Hard Disk Use this category to create an iSCSI target from a physical disk, disk partition, standard image file, RAM disk, security image, or virtual hard disk (VHD/VHDX). The available options are shown in Figure 2.
Image File RAM Space Security Images Disk Partition 2. Optical Device Use this category to create an iSCSI target from a physical optical drive, a virtual optical drive, or a virtual CD/DVD burner. The available options are shown in Figure 3.
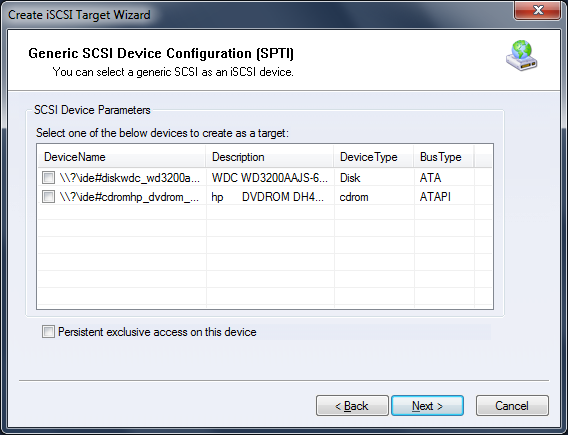
Virtual Optical Drive Virtual Recordable Optical Drive Physical Drive 3. Generic SCSI Use this category to map generic SCSI devices to an initiator, such as USB storage, tape drives, and optical scanners, as shown in Figure 4.
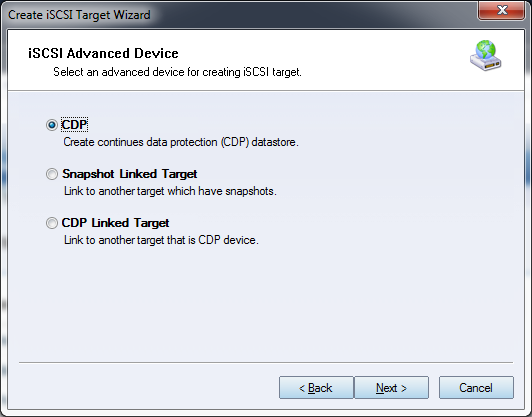
4. Advanced Device This category lets you create advanced devices such as CDP and snapshot-linked targets.
Create a Continuous Data Protection device. Snapshot Linked Target Create a target that is linked to an existing target for snapshot-based workflows. CDP Linked Target Create a CDP-enabled target that is linked to an existing target. 5. Storage Volume Create an iSCSI target from a Storage Pool volume. This option is useful when you need pooled capacity with RAW, thin-provisioned, or log-structured volumes.
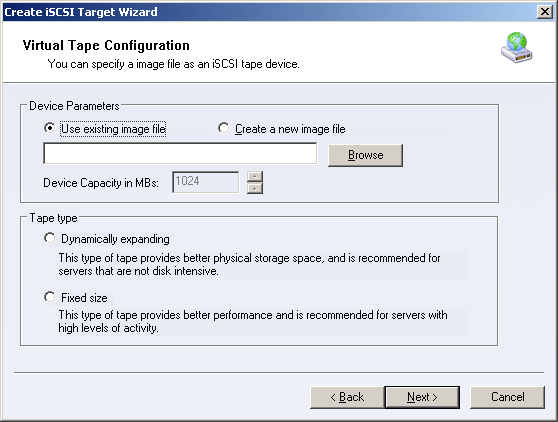
6. Tape Create iSCSI tape devices by using a virtual tape image, a physical tape drive, or a physical disk as a VTL backend for enterprise backup workflows.
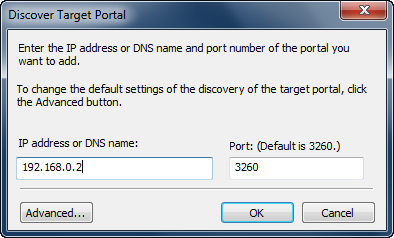
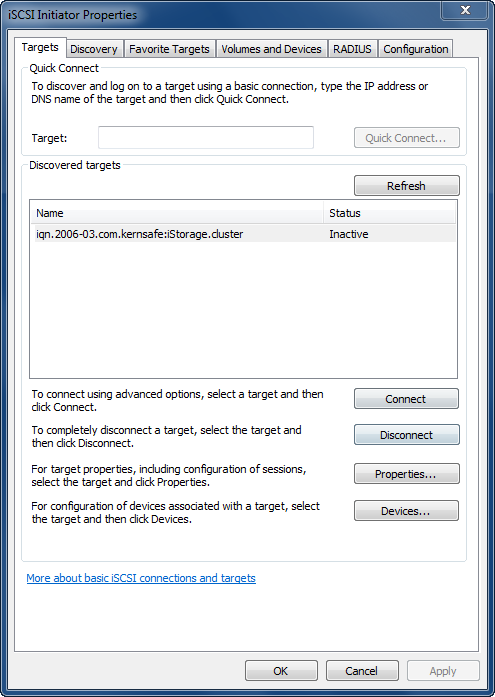
On the client side, the Microsoft iSCSI Initiator can be used as an example. Open Microsoft iSCSI Initiator, go to the Discovery tab, and click Discover Portal... in the Target Portals area. This opens the Discover Target Portal dialog box shown in Figure 6. In the Add Target Portal dialog box, enter the name or IP address of the computer that is running KernSafe iSCSI SAN. The default iSCSI communication port is 3260, so you normally do not need to change it. After the portal is added, switch to the Targets tab to view the available targets, as shown in Figure 7.
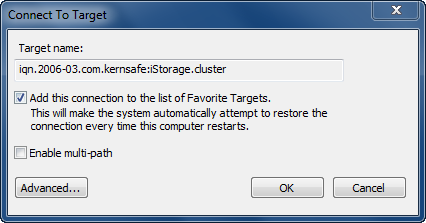
Select the target you want to use and click Log On. The dialog box shown in Figure 8 lets you confirm the connection settings.
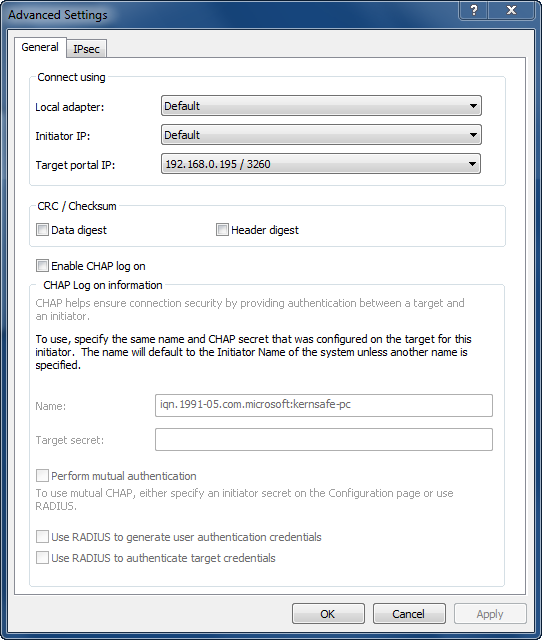
Click Advanced if additional settings are required. The Advanced Settings dialog box is shown in Figure 9. If the target uses CHAP authentication, enter the CHAP user name and secret there.
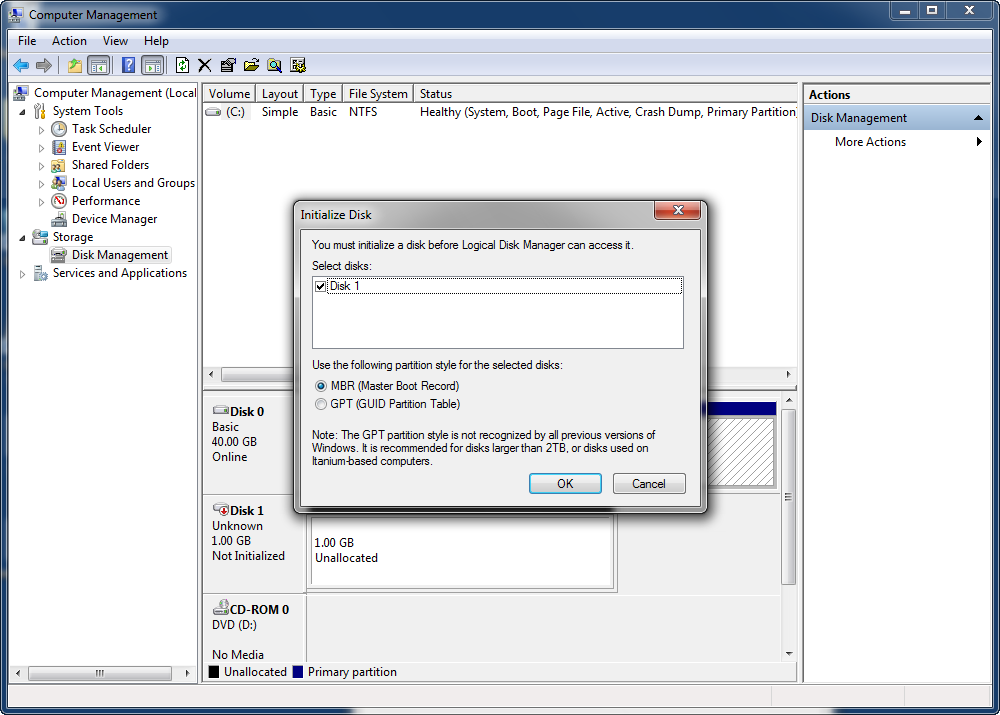
When you attach a brand-new iSCSI volume to Windows, the operating system treats it like a newly installed physical disk. Open Computer Management, select Disk Management, and initialize the disk if prompted, as shown in Figure 10. As with a physical hard disk, initialize the new drive, create a partition, and format the volume before use. You can now start using the target. |
|


SUPPORT
- Forum
- Support Ticket
- [email protected]

- Voice Mail:
- +1 (518) 289-4888