
iStorage Server Online Help

| About Disk Partition | KernSafe iSCSI SAN User Manual |
|
A Disk Partition device exports an existing partition as an iSCSI disk device. KernSafe iSCSI SAN presents the existing file system to client machines, which makes this option a straightforward way to share storage. Creating a Disk Partition Device Follow the steps below to create a Disk Partition target. Step 1. Select Service->Create Target from the KernSafe iSCSI SAN Management Console.
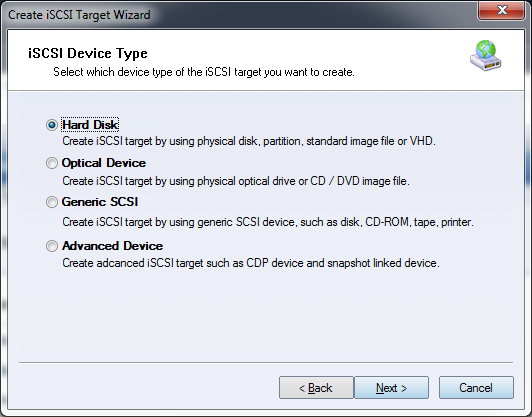
Choose Hard Disk in the iSCSI Device Type group. Press Next to continue.
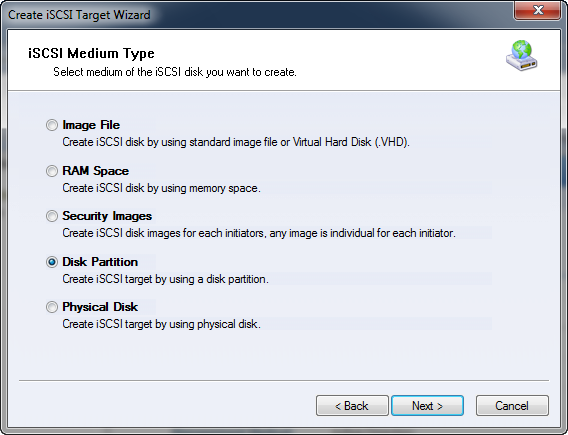
Choose Disk Partition in the iSCSI Device Type group. Press Next to continue. Step 2. Configure the Disk Partition device.
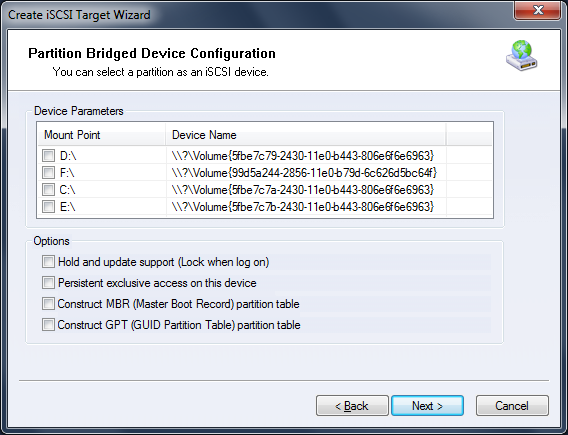
Select the required physical partition from the device parameter list. The following options are available: Note: If you do not select Construct MBR or Construct GPT, the exported device is exposed as RAW and can be repartitioned and reformatted by the initiator. If you do create an MBR or GPT layout in the wizard, the partition table is fixed and the resulting disk cannot be repartitioned. Step 3. Set the authorization mode.
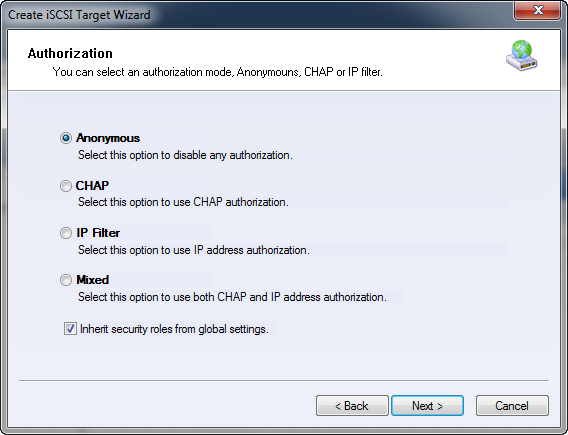
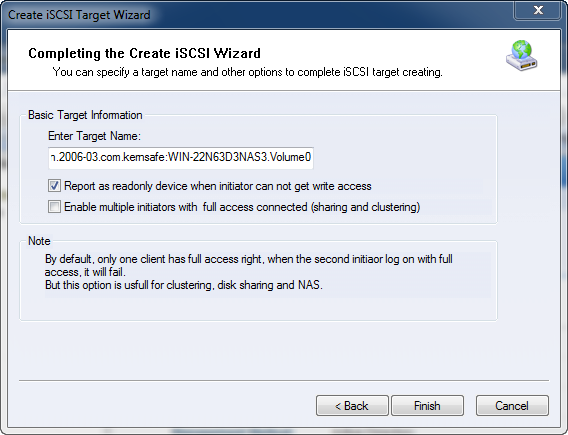
Select an authorization mode. If you need more information, see Authorization Mechanism. Press Next to continue. Step 4. Enter the target name.
Press Finish to complete device creation. | |

SUPPORT
- Forum
- Support Ticket
- [email protected]

- Voice Mail:
- +1 (518) 289-4888