

SuperSAN |


|
|||
|
||||


SuperSAN, the iSCSI SAN solution for Linux, is a Linux port of the Windows-based iStorage Server and is fully compatible with Windows iSCSI SAN environments. It supports nearly all enterprise features available in iStorage Server. Users can refer to the complete list of white papers and technical documentation here:
http://www.kernsafe.com/white-papers.aspx
Deploying SuperSAN is simple. Users only need a Linux system to install the SuperSAN core services. Management can then be performed remotely through either the built-in web management platform or the Windows management console.
For more information about installing and using SuperSAN on Linux, please refer to the following white paper:
SuperSAN: Installing and Using KernSafe iSCSI SAN on Linux
1. Installing SuperSAN
Download the SuperSAN installation package from the KernSafe website and extract it to any directory.
Open a Linux terminal and enter:
sudo -s
Enter the root password to obtain administrative privileges.
Navigate to the extracted SuperSAN package directory and run the ls command:
[root@server supersan]# lssupersan-8.0.0-1.el7.x86_64.rpm supersan-8.0.0.deb
Install the package using the appropriate command for your Linux distribution:
For CentOS / Fedora / Rocky Linux:
rpm -ivh supersan-8.0.0-1.el7.x86_64.rpm
For Debian / Ubuntu distributions:
dpkg -i supersan-8.0.0.deb
[root@server supersan]# rpm -ivh supersan-8.0.0-1.el7.x86_64.rpm Verifying... ################################# [100%]Preparing... ################################# [100%]Updating / installing... 1:supersan-8.0.0-1.el7 ################################# [100%]Once installation is complete, SuperSAN will be registered as a system service and will automatically start when the Linux system boots.
2. Web Management
After installing SuperSAN, the built-in web-based management platform, Storage Center, will also be installed automatically.
Open any web browser and navigate to:
http://localhost:3262/
or use the server IP address:
http://<server-ip>:3262/
Default login credentials:
Username: root
Password: kernsafe
Users can then manage the iSCSI SAN environment directly through the web browser by following the user guide.
3. Windows Remote Management
On Windows, launch the KernSafe iSCSI SAN Management Console and select:
Server -> Add Another Server...
In the popup window, enter the IP address of the Linux server and click the OK button.
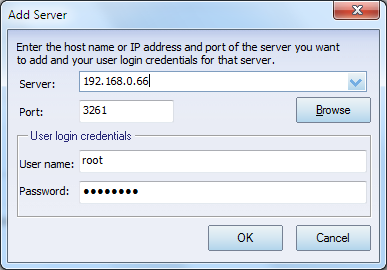
After adding the server, users can fully manage the SuperSAN environment by following the white papers or user manuals.
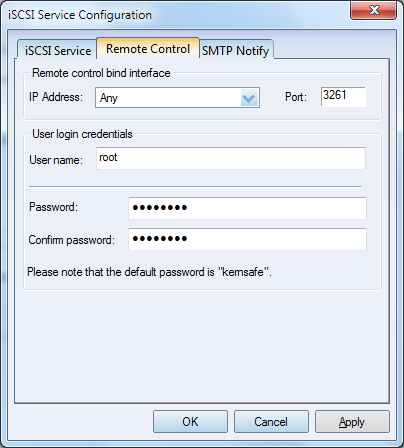
For security purposes, we strongly recommend changing the default management password after installation. Click the Settings button to modify the management password in the following window:
SUPPORT
- Forum
- Support Ticket
- [email protected]

- Voice Mail:
- +1 (518) 289-4888