

K-Backup Suite |


|
|||
|
||||


KernSafe K-Backup is network based automatic backup software for Microsoft Windows, before to use it, you need set up K-Backup Server.
On the toolbar of K-Backup Server, click Create->Datastore to create datastore for client backup, then the Create Datastore Wizard shows
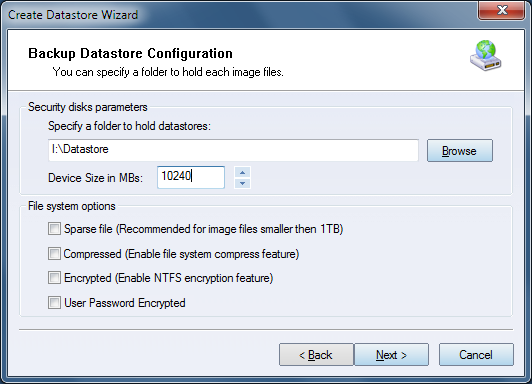
Specify the location for storing data files, and specify device size of each clients.
Press the Next button to continue.
Set up Datastore aurhorization
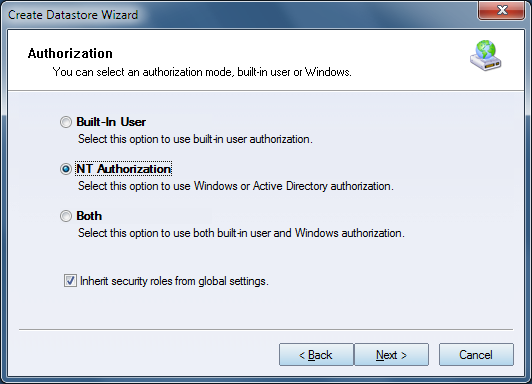
There are three type of authorization available, Built-In User, NT Authorization and Both.
For Built-In user, you need create users and groups in K-Backup Server, for
this topic, please refer to user's manual.
For NT Authorization, K-Backup Server will using Windows Account for
authorization.
Both, means use the same authorization at the same time.
Select NT Authorization and press the Next button.
Completing the datastore creating.
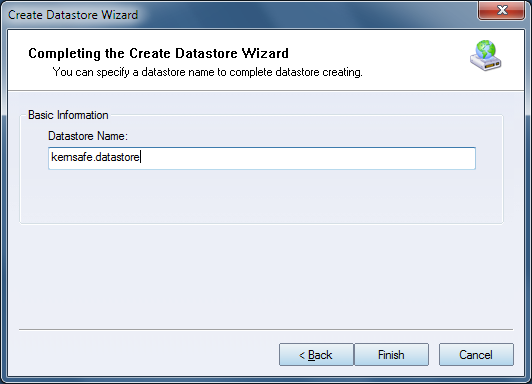
Press the Finish button to create datastore.
Now we will set up K-Backup to perform automatic network backup.
Launch K-Backup Suite management console and click the Backup Medium and change medium page.
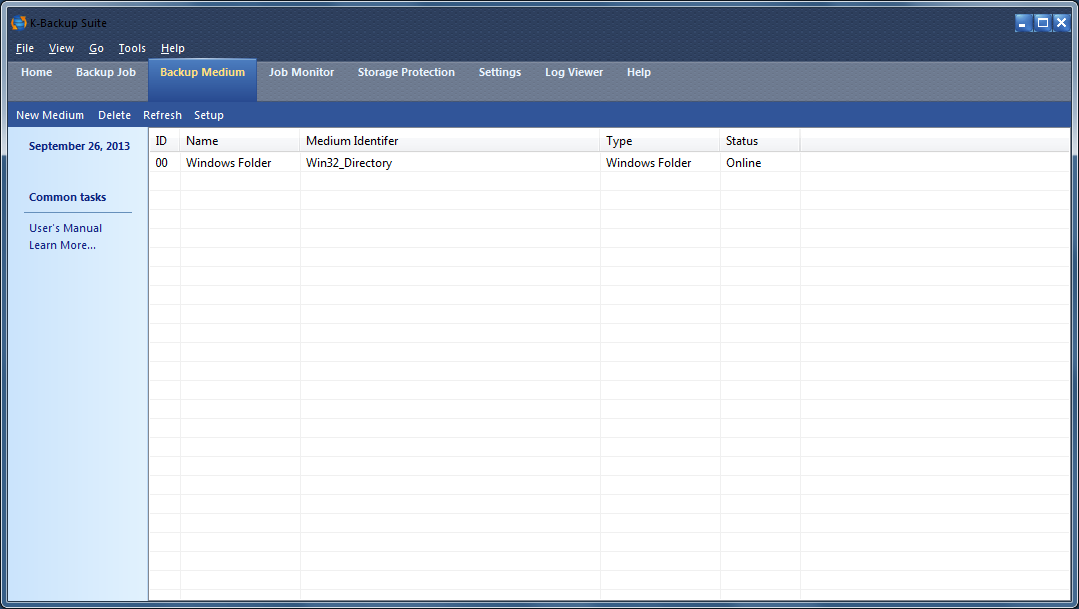
Click the New Medium button, then Mount Device wizard shows.
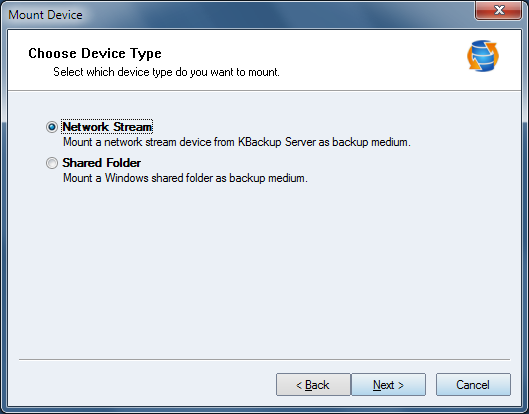
Select Network Stream and then press the Next button to continue.
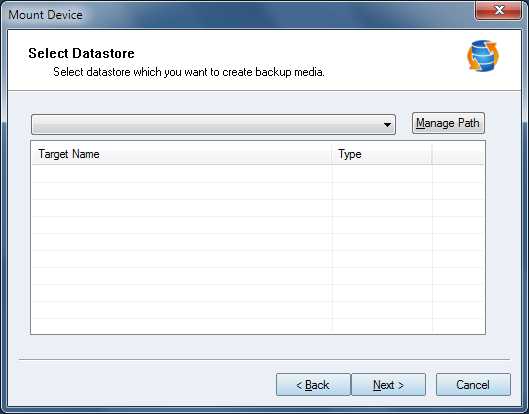
Click the Manage Path button and add your servers' IP address, and press the OK button.
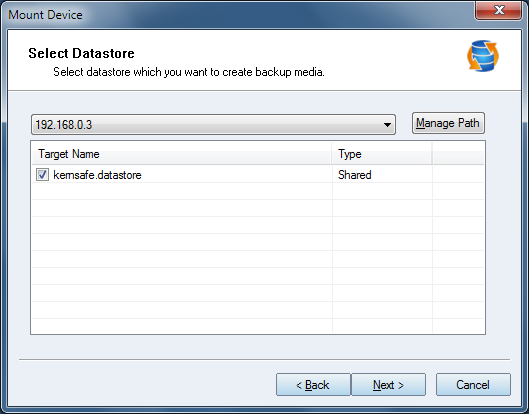
Select the datastore that we just created in the K-Backup Server and press the Next button to continue.
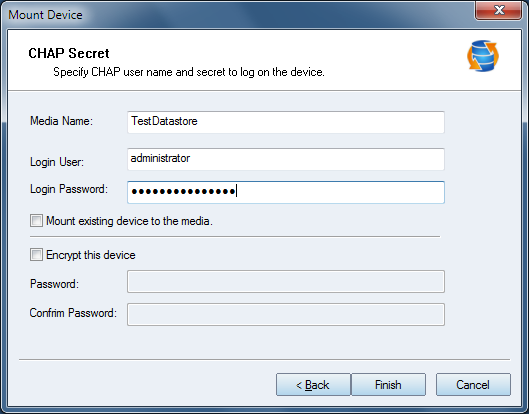
Type a datastore name, user name and password, as in server we use NT authorization, we use built-in user "administraotr" as an example.
As it is a new created datastore, leave "Mount existing device to the media" as unchecked.
You can also specify encryption password if you want encryption the whole media device in the client side.
Press the Finish button to create the Media.
Change to Backup Job page.
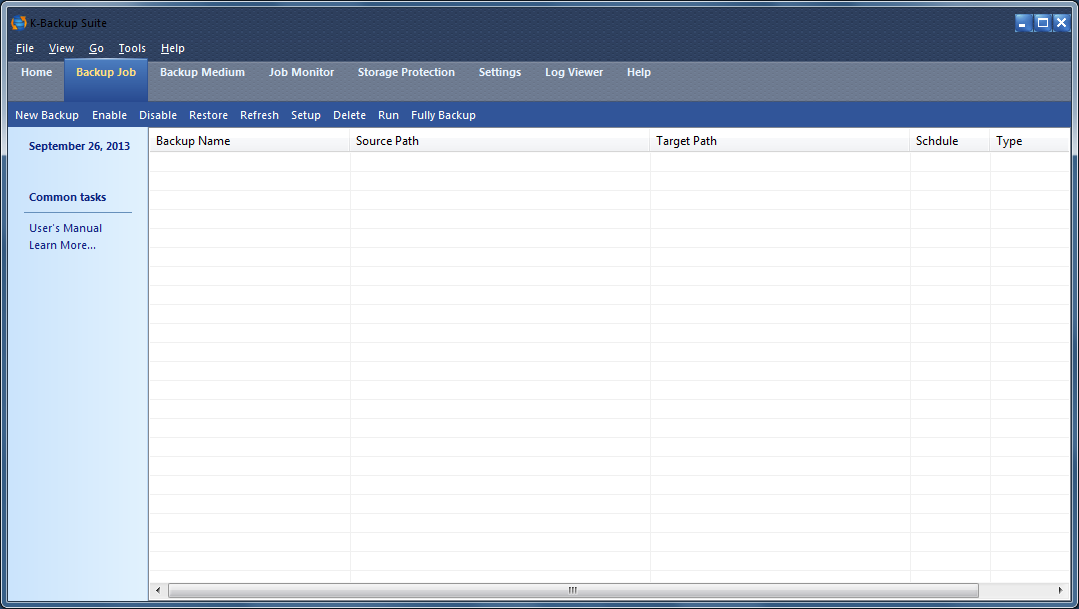
Click the New Backup button, then Backup wizard shows.
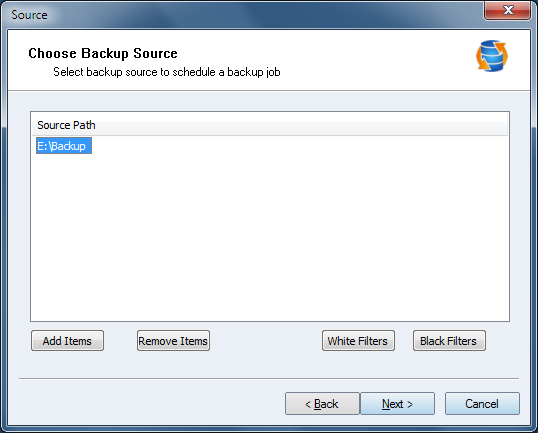
Click the Add Items button to add local folders to backup, you can also specify filters to filter some data files that you don't want to backup, for more information, please refer to user's manual.
Press the Next button to continue.
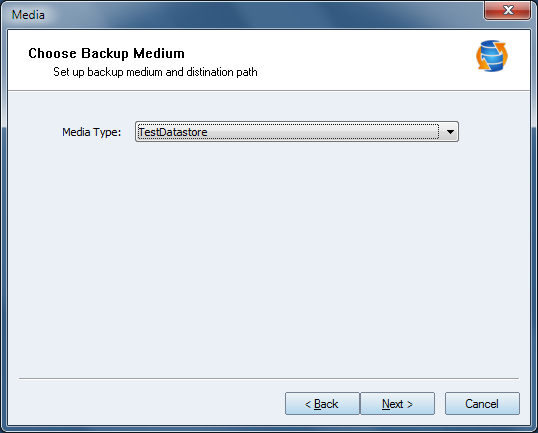
In the Media page, we use the media that we just created.
Press the Next button to continue.
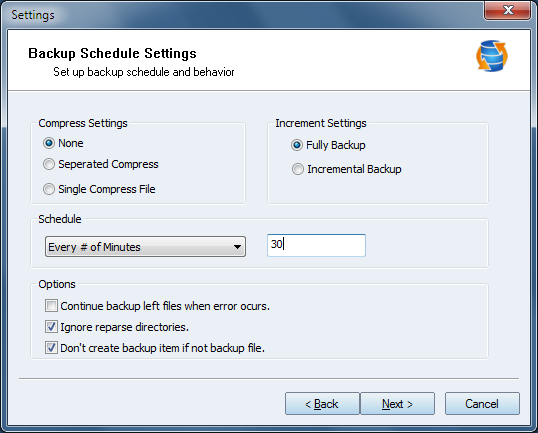
Specify parameters for the backup job, for more information, please refer to user's manual.
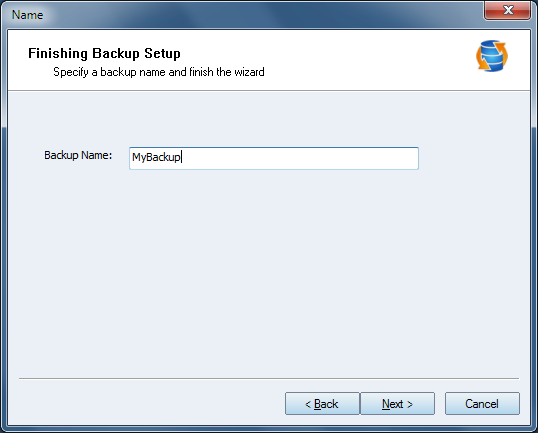
Type a name for the backup job and then press the Next button to continue.

Check if all the information are correct, if not, press the Backup button to modify, otherwise, press the Finish to finish backup job creating.
SUPPORT
- Forum
- Support Ticket
- [email protected]

- Voice Mail:
- +1 (518) 289-4888